Posts tagged with “Debian”

Radicale Cal/Card DAV

Radicale

Descrizione

Radicale è un piccolo ma potente server CalDAV (calendari, elenchi di cose da fare) e CardDAV (contatti), che:

  • Condivide calendari ed elenchi di contatti tramite CalDAV, CardDAV e HTTP.
  • Supporta eventi, todos, voci del diario e biglietti da visita.
  • Funziona subito, senza bisogno di complicate impostazioni o configurazioni.
  • Può limitare l'accesso tramite autenticazione.
  • Può proteggere le connessioni con TLS.
  • Funziona con molti client CalDAV e CardDAV.
  • Memorizza tutti i dati sul file system in una semplice struttura di cartelle.
  • Può essere esteso con plugin.
  • È un software libero con licenza GPLv3.

Requisiti/Installazione

Innanzitutto, assicurarsi che python 3.5 o successivo (si consiglia python ≥ 3.6) sia installato. Sarà poi necessario un web server come Apache o nginx; in questa guida verrà usato nginx e verranno installati pacchetti presenti in Debian, anziché usare "pip".

Documentazione Ufficiale

Installazione

# apt install radicale apache2-utils python3-passlib

Configurazione

# nano /etc/radicale/config

Cambiare le linee seguenti:

 [server]
 hosts = 127.0.0.1:5232
 
 [auth]
 type = http_x_remote_user

 [rights]
 type = owner_only
 file = /etc/radicale/rights

 [storage]
 type = multifilesystem_nolock

 [logging]
 level = info
 mask_passwords = True

 [headers]
 Access-Control-Allow-Origin = *

Ora possiamo avviare il servizio:

# systemctl start radicale.service
# systemctl status radicale.service

Per leggere i log, digitare:

# journalctl -xe -u radicale.service

Quando avremo sistemato tutto e Radicale funzionerà correttamente, potremo abilitare il servizio al boot:

# systemctl enable radicale.service

Reverse proxy

Esempio di configurazione di nginx:

server {
    listen 443 ssl http2;
    server_name cal.woodpeckersnest.space;

    ssl_certificate /etc/letsencrypt/live/cal.woodpeckersnest.space/fullchain.pem;
    ssl_certificate_key /etc/letsencrypt/live/cal.woodpeckersnest.space/privkey.pem;

        error_log /var/log/nginx/radicale.err;
        access_log /var/log/nginx/radicale.log;

        add_header "X-XSS-Protection" "0";

    location / {
        return 301  /radicale/;
    }

    location /radicale/ { # The trailing / is important!
        proxy_pass        http://localhost:5232/; # The / is important!
        proxy_set_header  X-Script-Name /radicale;
        proxy_set_header  X-Forwarded-For $proxy_add_x_forwarded_for;
        proxy_set_header  X-Remote-User $remote_user;
        proxy_set_header  Host $http_host;
        proxy_pass_header Authorization;
        auth_basic        "Radicale - Password Required";
        auth_basic_user_file /etc/nginx/radicale-users;
        }
}

server {
    listen 0.0.0.0:80;
    server_name cal.woodpeckersnest.space;

    location / {
        return 301  /radicale/;
    }

    location /radicale/ {
        return 301 https://$host$request_uri;
    }
}

la riga che recita:

auth_basic_user_file /etc/nginx/radicale-users;

ci indica che dovremmo creare il file a quel percorso con le credenziali degli utenti che vorranno usare il servizio.

Il comando per fare ciò è "htpasswd"

$ htpasswd -c /etc/nginx/radicale-users <nome_utente>

Una volta battuto enter vi verrà chiesta la password per l'utente <nome_utente> che avrete scelto ed il tutto verrà salvato nel file "/etc/nginx/radicale-users". Riavviate nginx per terminare.

Come potete vedere dal file di configurazione nginx, avrete bisogno di un sottodominio DNS e del relativo certificato (tutto ciò non è scopo di questa guida).

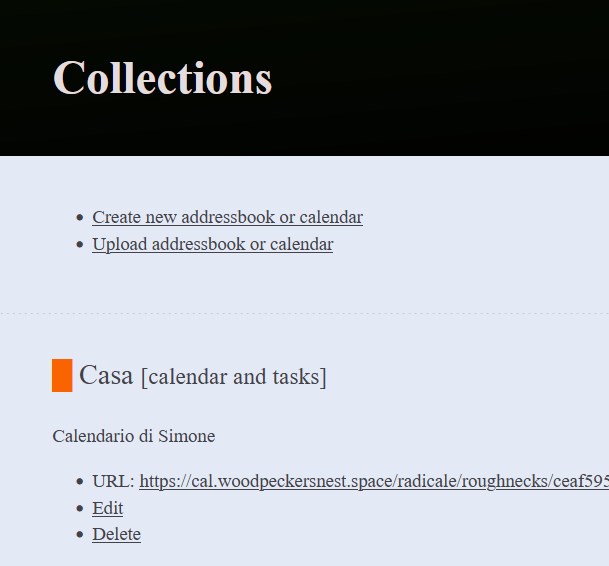
Abbiamo terminato: connettetevi al vostro sottodominio e dovreste poter accedere alla pagina di login di Radicale. Seguendo il file di configurazione nginx, per il mio caso il link sarà il seguente:

https://cal.woodpeckersnest.space/


Special characters in DBs are a no-go

Remember: don't ever use special characters in your DB's users password!!

I have been troubleshooting a migration from mariadbd to pgsql for several hours, until I tried changing my password, which, weirdly enough, was working to connect roundcube but gave errors with pgloader. Once I successfully migrated using the same password with those special characters, roundcube wouldn't connect with pgsql, so I made another fighting round! Finally changed my pgsql password to some letters and numbers only and BAM!, it worked.

Then I stopped mariadbd and disabled the service; now I have more than 200MB RAM freed¹.

¹ See previous post.


mariadbd is a memory hog

A fat pig eating with its mouth and nose all dirty

I'm still struggling to understand why mariadbd uses so much memory for just 1 DB and 1 application, which in this case is roundcube.

I tried changing this value to no avail.. If anyone wants to share some thoughts I would appreciate:

[mariadb]
innodb_buffer_pool_size=128M

Leave a comment if you know shit. Thanks

EDIT: some details

OVH VPS, 1 core, 2GB, 20 GB SSD. mariadb-server 1:10.11.4-1~deb12u1. roundcube DB size 2.41MB, 17 tables. RAM taken at process restart 240MB.


Unauthenticated email from [DOMAIN] is not accepted due to 550-5.7.26 domain's DMARC policy.

I was enabling Exim on my IONOS VPS to deliver email through a smarthost and encountered the error message in this post's title (unable to send to Gmail users.. It's always them!)

After fiddling a while with DMARK and SPF I reconfigured Exim itself to rewrite sender address, so that emails coming from "spacenest.it" (IONOS domain) were sent as coming from "woodpeckersnest.eu", the smarthost and real email server.

Everything is done via this command:

# dpkg-reconfigure exim4-config

And the resulting configuration in /etc/exim4/update-exim4.conf is:

dc_eximconfig_configtype='smarthost'
dc_other_hostnames='cassandra.spacenest.it;spacenest.it'
dc_local_interfaces='127.0.0.1'
dc_readhost='woodpeckersnest.eu'
dc_relay_domains=''
dc_minimaldns='false'
dc_relay_nets=''
dc_smarthost='pandora.woodpeckersnest.space::587'
CFILEMODE='644'
dc_use_split_config='false'
dc_hide_mailname='true'
dc_mailname_in_oh='true'
dc_localdelivery='mail_spool'

On OVH's postfix I just had to modify this line in /etc/postfix/main.cf:

mynetworks = 127.0.0.0/8 [::ffff:127.0.0.0]/104 [::1]/128 94.143.138.27/32

where that last IP is the IP Address of my IONOS server.


Process Keepalive

Scope: restart a process if it exited for any reason

To do: edit "process-restart.sh" substituting "process" with the actual process name and startup command/path. Moreover you'd want to rename both file with the process name. To find what the actual process name is, do a ps aux | grep <name> and then test with pgrep -f <process_you_found> - see if it returns the correct PID.

Usage: run ./process-loop.sh

TIP: always use TMUX or screen.

I'm using this method to keep my bots¹ and the ETS2 server always running:

¹ BOTS == ZED, a couple XMPP bots, Simplebot Mastodon etc..

File attachment:

process-keepalive.zip (0.5 KB)

Wireguard Configuration

wg0.conf

[Interface]
# specify generated private key for server
PrivateKey = <privkey>
# IP address for VPN interface
Address = 172.16.100.1/32
MTU = 1420
# UDP port WireGuard server listens
ListenPort = 51820

# set routing rules like follows to access to local network via VPN session
PostUp = iptables -A FORWARD -i wg0 -j ACCEPT; iptables -t nat -A POSTROUTING -o ens3 -j MASQUERADE
PostDown = iptables -D FORWARD -i wg0 -j ACCEPT; iptables -t nat -D POSTROUTING -o ens3 -j MASQUERADE
# change "ens3" with your interface

[Peer]
# specify public key for client
PublicKey = <pubkey>
# clients' VPN IP addresses you allow to connect
# possible to specify subnet ⇒ [172.16.100.0/24]
AllowedIPs = 172.16.100.6

client.conf

[Interface]
# Private IP Address
Address = 172.16.100.6/32
# Client's Private Key
PrivateKey = <privkey>
# Server's listening port
ListenPort = 51820

[Peer]
# Server's Public Key
PublicKey = <pubkey>
AllowedIPs = 0.0.0.0/0
# Server's IP:port
Endpoint = 51.195.43.203:51820

If you want to scan a QR code on your phone to load the client.conf, do as follows:

# apt install qrencode
$ qrencode -t utf8 < client.conf

A QR code will appear, scan it.

Thanks to "to_red" for helping me out with the configuration 😉


Maildir with Postfix/Dovecot/mutt

Using the Maildir mailbox format, emails are stored in under the recipient user’s home folder /home/<username>/Maildir.

# postconf -e 'home_mailbox = Maildir/'

You might also want to add the Maildir setup to the user home directory template so that it is automatically configured when a new user account is created:

# maildirmake.dovecot /etc/skel/Maildir
# maildirmake.dovecot /etc/skel/Maildir/.Drafts
# maildirmake.dovecot /etc/skel/Maildir/.Sent
# maildirmake.dovecot /etc/skel/Maildir/.Trash
# maildirmake.dovecot /etc/skel/Maildir/.Templates

The same Maildir can be added to the current user with the commands below. Replace the $USER with any existing username:

# cp -r /etc/skel/Maildir /home/$USER/
# chown -R $USER:$USER /home/$USER/Maildir
# chmod -R 700 /home/$USER/Maildir
# adduser $USER mail

Also create a “.muttrc” file under /etc/skel and copy paste this content in it:

set mbox_type=Maildir
set folder="~/Maildir"
set mask="!^\\.[^.]"
set mbox="~/Maildir"
set record="+.Sent"
set postponed="+.Drafts"
set spoolfile="~/Maildir"

Monit - System Monitoring

I'm going to paste my working Monit configuration file for anyone attempting to make it work under Debian

  set daemon  120
  set log /var/log/monit.log
  set idfile /var/lib/monit/id
  set statefile /var/lib/monit/state

set ssl {
     verify     : enable
 }

  SET MAILSERVER
        pandora.woodpeckersnest.space
        PORT 465
        USERNAME <username> PASSWORD <password>
        using SSL

  set eventqueue
     basedir /var/lib/monit/events
     slots 100

  set alert <username>@woodpeckersnest.space not on { instance }

  set httpd port 2812 and
   use address 0.0.0.0
   allow 0.0.0.0/0.0.0.0
   allow admin:<password>
   with ssl {
         pemchain: /etc/monit/fullchain.pem
         pemkey: /etc/monit/privkey.pem
        }

  check system PANDORA
    if cpu usage > 95% for 10 cycles then alert
    if memory usage > 85% then alert
    if swap usage > 50% then alert

  check network ens3 with interface ens3
    if link down then alert
    if changed link then alert
    if saturation > 90% then alert

  check filesystem rootfs with path /
    if space usage > 80% then alert
    if space usage > 85% then alert
    if space usage > 90% then alert
    if space usage > 95% then alert

  check host pandora.spacenest.it with address 94.143.138.27
    if failed ping then alert
    if failed port 22 protocol ssh
    then alert

Then there are files under /etc/monit/conf.d/* and/or /etc/monit/conf-enabled/*. I only have 3:

nginx:

 check process nginx with pidfile /var/run/nginx.pid
   group www-data
   start program = "/etc/init.d/nginx start"
   stop program = "/etc/init.d/nginx stop"

postfix:

 check process postfix with pidfile /var/spool/postfix/pid/master.pid
     start program = "/etc/init.d/postfix start"
     stop  program = "/etc/init.d/postfix stop"
     if failed
        port 25
        protocol smtps
        username "<your_username>"
        password "<your_password>"
     then alert

sshd:

 check process sshd with pidfile /var/run/sshd.pid
   start program  "/etc/init.d/sshd start"
   stop program  "/etc/init.d/sshd stop"
   if failed port 22 protocol ssh then restart

Monit manual is very helpful, you should check it out.


A new home

Do we need it? Nope.

Do I like it? YEP!

Will be posting about my (mis)adventures while administering a VPS.. Or more than one? For the time being I've just installed this beauty, called "chyrp-lite"