Posts tagged with “python”

Night tinkering..

Written by Simone

I am most productive at night, when there is finally silence - apart from background music. The last couple hours of this Wednesday brought some nice additions to the @wpn support MUC:

  • chat is not XMPP only anymore, but it got bridged to Matrix, via "matterbridge".
  • a bot is now sending "BOFH excuses" to the chat, once a day.

XMPP MUC can be reached from: https://invite.woodpeckersnest.space/#status@chat.woodpeckersnest.space?join

Matrix room can be reached from: https://matrix.to/#/#wpn:matrix.org

Bridged chat means that everything being written in any of those rooms, gets relayed to the other by bots: there are in fact 2 bots connected to the 2 rooms, one is an XMPP bot and the other is a Matrix one, operated by "matterbridge", as I said earlier.

About "BOFH excuses", they are some fortune cookies from the relative Linux package, which are all about "Bastard Operators From Hell" excuses.. They are some short funny sentences about IT which an imaginary Operator (sysop, sysadmin, you name it) could say as excuse to justify issues.

Example?

BOFH excuse #266:
All of the packets are empty.

I have the same script running on gemini, at gemini://woodpeckersnest.space/cgi-bin/bofh

Basically it's some python spaghetti which runs the fortune command, does some formatting to the resulting text and sends it over gemini, or in the case of @wpn chat, over webhook to one other bot, which then posts its content to XMPP. It's more complicated to explain than do it 😀

P.S. @wpn support MUC is not publicly listed, so even if I'm posting links which may be used to join it, it should be treated as limited to @wpn users only.

gemlog

@wpn onboarding: updates

Written by Simone

I was running 2 separate apps for shell/XMPP account registration at @wpn, so far..

This night I made some changes to the original code (provided by Schimon) and I got just one app with account choice - meaning that you must choose what account type you want in the form. Shell accounts are for friends only, as it's always been.

As a consequence of that, I shut down the old address for XMPP account onboarding and left only the main one, which is:

https://hello.woodpeckersnest.space/

gemlog

Slixfeed RSS XMPP BoT

Written by Simone

Interesting project, features' rich and almost complete. Thanks goes to its main developer Schimon AKA "sch".

Here is the support room

mumble-web (mis)adventure

Written by Simone

Today I wanted to install yet another web frontend for the services I host, i.e. mumble-web

mumble-web is an HTML5 Mumble client for use in modern browsers.

I won't bore you with the install details, just know that it's basically JS and you need to install npm modules.. After some processing and a whole lot of deprecation warnings on screen, it finally failed. Then I looked at the logs it left and it was searching for python2!! Went back to the github page and found out the code is from about 3 years ago, with the latest issue being about one guy managing to build the software on Debian 11 with some old NodeJs version..

So, after a bit of disappointment, I delete the whole directory and be done with it. You know, there's no alternatives out there 😟

Now I would like to ask a question to disroot admins: how the hell are you running this junk on your server!? I believe they're using docker, still it's not safe in my opinion to run such old-unmaintained stuff.

I won't be doing that.

Radicale Cal/Card DAV

Written by Simone

Radicale

Descrizione

Radicale è un piccolo ma potente server CalDAV (calendari, elenchi di cose da fare) e CardDAV (contatti), che:

  • Condivide calendari ed elenchi di contatti tramite CalDAV, CardDAV e HTTP.
  • Supporta eventi, todos, voci del diario e biglietti da visita.
  • Funziona subito, senza bisogno di complicate impostazioni o configurazioni.
  • Può limitare l'accesso tramite autenticazione.
  • Può proteggere le connessioni con TLS.
  • Funziona con molti client CalDAV e CardDAV.
  • Memorizza tutti i dati sul file system in una semplice struttura di cartelle.
  • Può essere esteso con plugin.
  • È un software libero con licenza GPLv3.

Requisiti/Installazione

Innanzitutto, assicurarsi che python 3.5 o successivo (si consiglia python ≥ 3.6) sia installato. Sarà poi necessario un web server come Apache o nginx; in questa guida verrà usato nginx e verranno installati pacchetti presenti in Debian, anziché usare "pip".

Documentazione Ufficiale

Installazione

# apt install radicale apache2-utils python3-passlib

Configurazione

# nano /etc/radicale/config

Cambiare le linee seguenti:

 [server]
 hosts = 127.0.0.1:5232
 
 [auth]
 type = http_x_remote_user

 [rights]
 type = owner_only
 file = /etc/radicale/rights

 [storage]
 type = multifilesystem_nolock

 [logging]
 level = info
 mask_passwords = True

 [headers]
 Access-Control-Allow-Origin = *

Ora possiamo avviare il servizio:

# systemctl start radicale.service
# systemctl status radicale.service

Per leggere i log, digitare:

# journalctl -xe -u radicale.service

Quando avremo sistemato tutto e Radicale funzionerà correttamente, potremo abilitare il servizio al boot:

# systemctl enable radicale.service

Reverse proxy

Esempio di configurazione di nginx:

server {
    listen 443 ssl http2;
    server_name cal.woodpeckersnest.space;

    ssl_certificate /etc/letsencrypt/live/cal.woodpeckersnest.space/fullchain.pem;
    ssl_certificate_key /etc/letsencrypt/live/cal.woodpeckersnest.space/privkey.pem;

        error_log /var/log/nginx/radicale.err;
        access_log /var/log/nginx/radicale.log;

        add_header "X-XSS-Protection" "0";

    location / {
        return 301  /radicale/;
    }

    location /radicale/ { # The trailing / is important!
        proxy_pass        http://localhost:5232/; # The / is important!
        proxy_set_header  X-Script-Name /radicale;
        proxy_set_header  X-Forwarded-For $proxy_add_x_forwarded_for;
        proxy_set_header  X-Remote-User $remote_user;
        proxy_set_header  Host $http_host;
        proxy_pass_header Authorization;
        auth_basic        "Radicale - Password Required";
        auth_basic_user_file /etc/nginx/radicale-users;
        }
}

server {
    listen 0.0.0.0:80;
    server_name cal.woodpeckersnest.space;

    location / {
        return 301  /radicale/;
    }

    location /radicale/ {
        return 301 https://$host$request_uri;
    }
}

la riga che recita:

auth_basic_user_file /etc/nginx/radicale-users;

ci indica che dovremmo creare il file a quel percorso con le credenziali degli utenti che vorranno usare il servizio.

Il comando per fare ciò è "htpasswd"

$ htpasswd -c /etc/nginx/radicale-users <nome_utente>

Una volta battuto enter vi verrà chiesta la password per l'utente <nome_utente> che avrete scelto ed il tutto verrà salvato nel file "/etc/nginx/radicale-users". Riavviate nginx per terminare.

Come potete vedere dal file di configurazione nginx, avrete bisogno di un sottodominio DNS e del relativo certificato (tutto ciò non è scopo di questa guida).

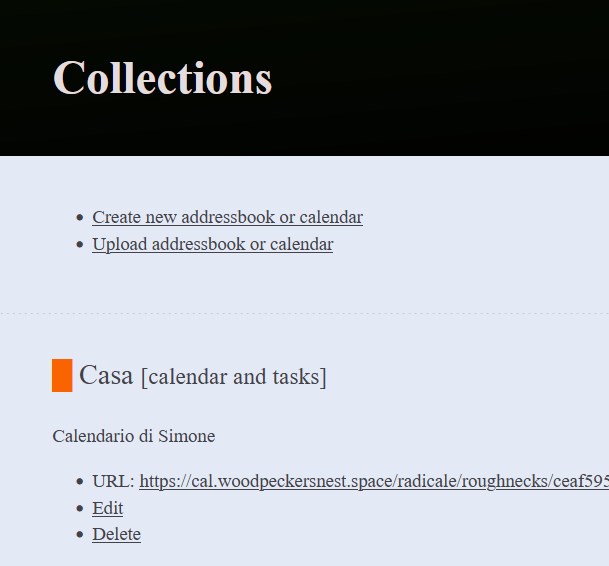
Abbiamo terminato: connettetevi al vostro sottodominio e dovreste poter accedere alla pagina di login di Radicale. Seguendo il file di configurazione nginx, per il mio caso il link sarà il seguente:

https://cal.woodpeckersnest.space/